Painting the Front Door for Instant Curb Appeal
This post may contain affiliate links. Please read my Disclosure page for more information.
Most buyers will decide if they like a home within the first thirty seconds of seeing it, which makes curb appeal so very important. Painting your front door is one way to turn your home from drab to fab and give it amazing curb appeal!
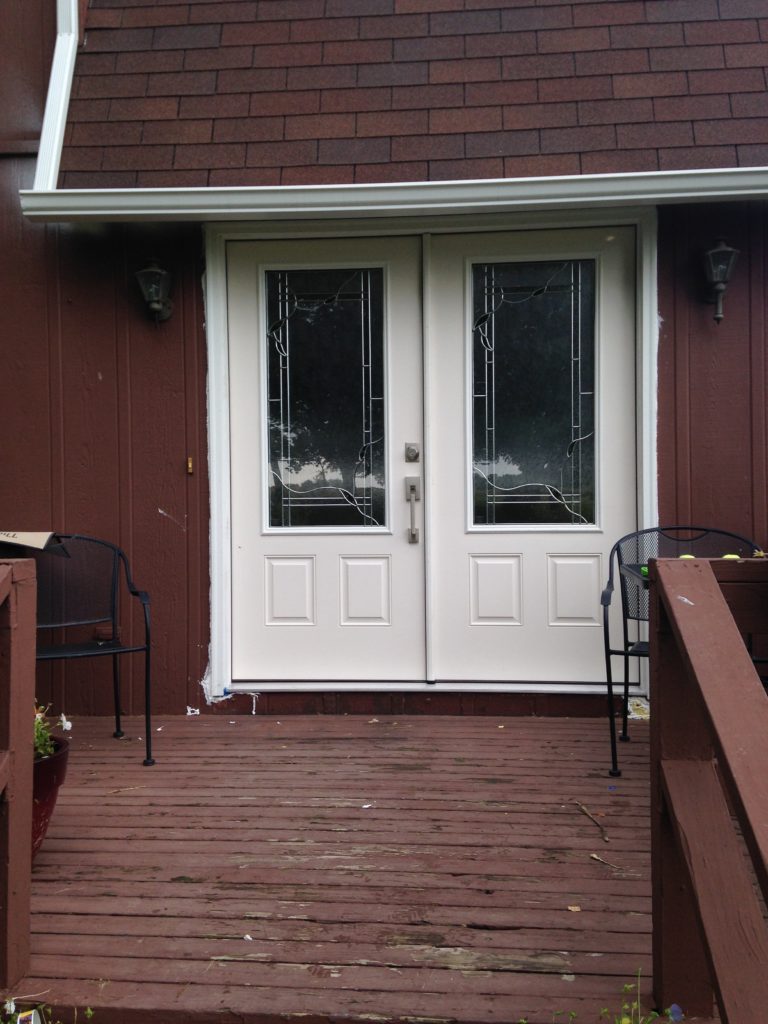
The “Before”- brown siding, roofing, deck. But we had new front doors. They just needed color.
When John and I moved into our first fixer-upper in Mt. Vernon, Illinois, the siding and roof were brown and the door was pink. Eeek! Needless to say, it was not the curb appeal we fell in love with on this home. We loved the home’s location, 10 acre property with a pond, large windows, and vaulted ceilings in the living room. In a way, we knew we were destined for a “project” type of home.
In future blog posts, I will go over our various other curb appeal projects. We changed our siding to a blue-gray with white trim and the roof to black. Everything popped! Now we needed a color for the front door. I had always imaged a maroon, and John preferred a black or brown (to look more like a wood texture). When we went to go look at some paint samples, I was also drawn to a mustard yellow. So many choices! Eventually, we found a brochure at the paint counter that had a similar color scheme to our home with a rusty orange-red door. The color was called “ancient copper” and we both loved it! After all, it was paint- if we didn’t like the final results, we could always repaint it.
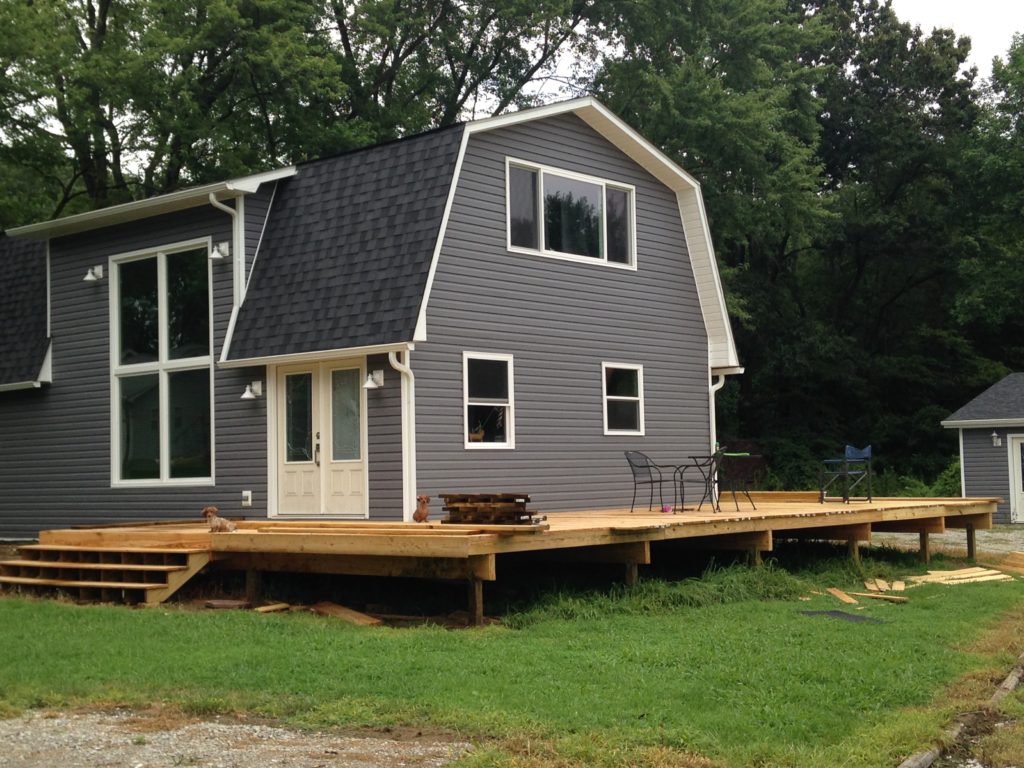
New siding, roof, and deck in progress. Time to paint that door and get some curb appeal!
Now it was time to gather all the supplies.
Here are the items you will need:
- quart of semi-gloss exterior paint
- paint brush
- mini paint roller
- painter’s tape (our favorite and trusty standby is Scotch Blue Multi-Surface Painter’s Tape
Luckily, it was a beautiful Fall day outside when we decided to amp up our curb appeal. Although you probably could paint your door while it is still on the hinges, I would not recommend it. We removed our doors from the hinges, took off the door handle and lock, and placed the doors on two saw horses. With the doors being on saw horses, air was able to flow around the doors more easily. Also, this prevented any paint from dripping down the doors.
Earlier in the year we had replaced our exterior doors with all new ones, but my goodness- how a few months can really dirty white doors. If you aren’t buying into the idea of painting your front doors a fun color for curb appeal purposes, you may want to consider painting them just to hide dirt! Before painting our “new” doors, I had to wash and dry them. I know dish soap and warm water probably would have done the trick, but I did not want to spend 30 minutes scrubbing the doors. Thanks to Mr. Clean Magic Erasers is took less than 5 minutes to wipe away all the rain water stains. They seriously are magic!
Because our double front doors both have a three-quarter glass windows, I lined the glass with Scotch painter’s tape. We did not want to get paint on the glass so having the painters tape actually helped out a bunch!
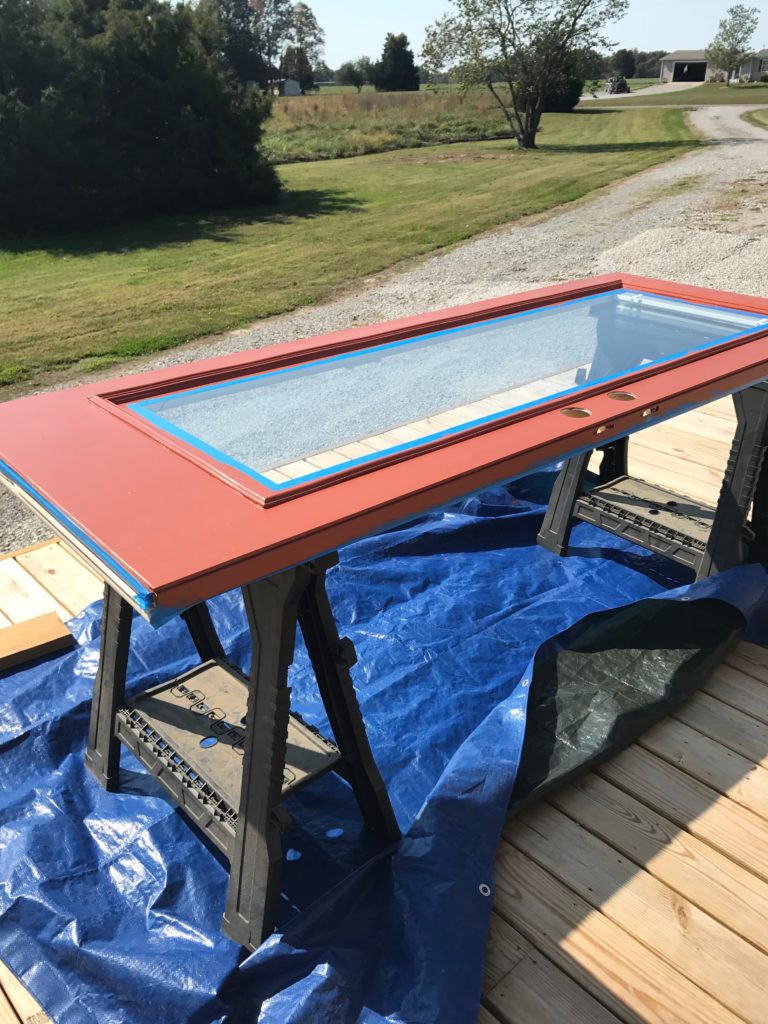
Door Painting in Progress- This is actually our back door being painted. Why not, right?!
It was finally time to paint- my favorite part!
Once we taped off the glass, I could finally dip into that beautiful “ancient copper” paint. I started out using a paint brush to go along the creases of the door as well as where the glass meets the door. Then I broke out the nifty mini paint roller and gave the doors a solid first coat. I love the mini roller because it’s petite and easy to use on a small surface like our front doors. It also allows for a smooth coating of paint without the brushstrokes.
Because the doors were elevated on saw horses on the deck, they didn’t take long to dry. After finishing my first coat of paint on door number one, I was able to trim out and roll paint onto door number two- giving my first door’s first coat of paint time to dry. It was the perfect assembly line! And all they needed was two solid coats of paint.
When it came to pulling off the painter’s tape, here is where you can learn from our mistake. We left the tape on the door until the paint had almost completely dried. When we went to pull off the tape, we ended up peeling some of the paint on the door. Ahhh! In hindsight, we have figured out two ways that will work better. The first way is to pull off the tape when the paint is still wet. Another way is to still allow the paint to dry. However, before pulling off the tape, score the edge with a sharp utility knife or box cutter. Because we have painted a few other exterior doors since this project, I can say that both of the last two methods with the painter’s tape work well without peeling off the paint.
Put the finishing touches on this afternoon project and make your home stand out on the block.
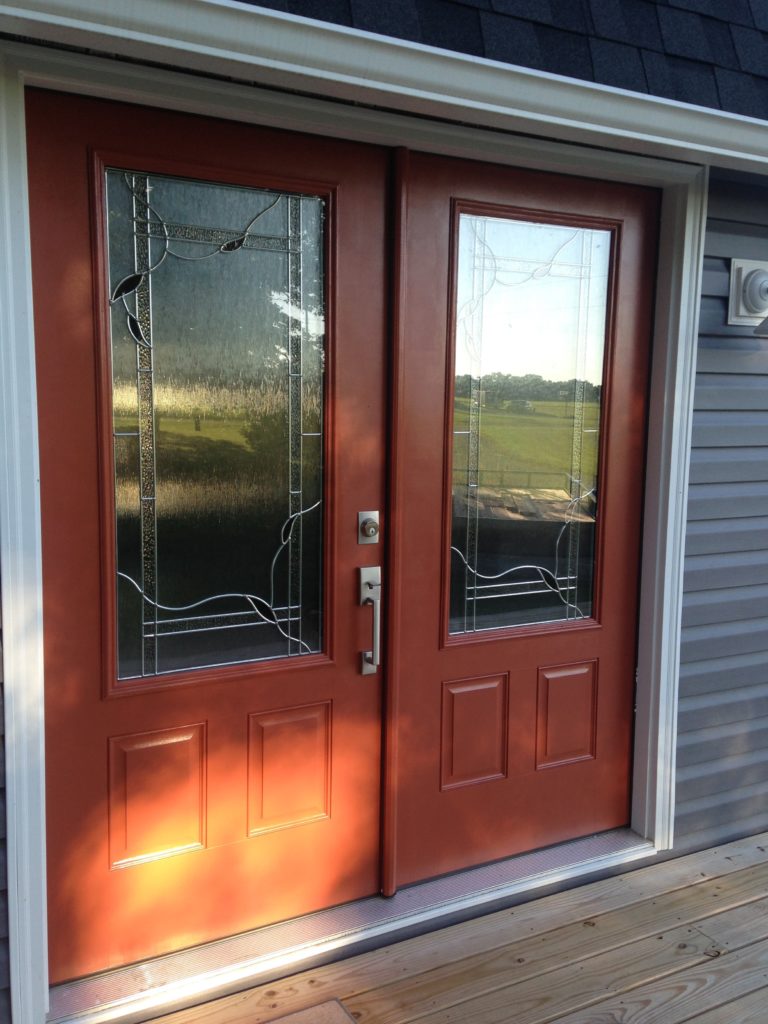
What do you think? Yay or nay?
After approximately 3-4 hours, the doors were dry enough to attach the hardware and place back onto their hinges. As with most people who paint complete curb appeal projects, John and I had to take a step back into the street and admire the finished product. Overall, we are happy with the color choice. It is simply amazing how such a simple, half day project can make such a huge impact on your home’s curb appeal. Now we just need to get some landscaping going on in our front yard and I think it will all come together nicely. Keep an eye out for a landscaping post in the near future- because flowers and plants will also add much needed curb appeal to a home’s first impression.
What do you think about the end result? In your opinion, what are some of your favorite front door paint colors that add curb appeal?
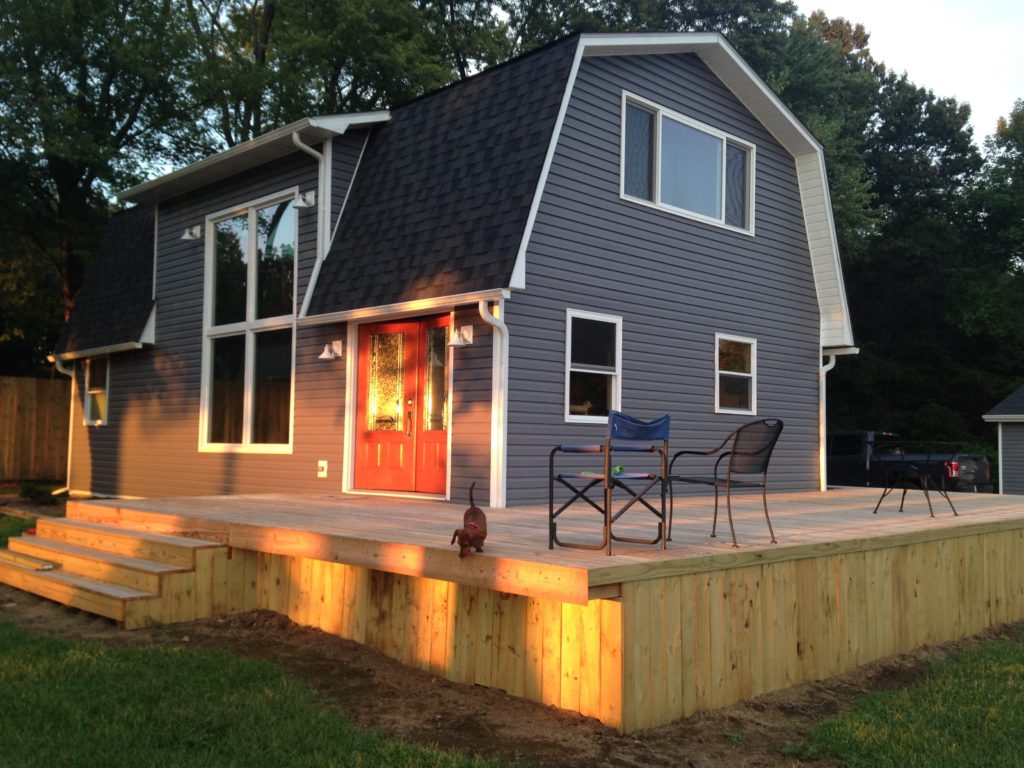
Finished Product- I’m glad we went with Ancient Copper for our front door color!


1 Comment
Leave your reply.